How to Use Custom Coloring in Video Star to Make Your Footage Pop
How to Use Custom Coloring in Video Star to Make Your Footage Pop is your guide to transforming your videos with vibrant, eye-catching colors. No matter how many cool effects you apply, the coloring can make or break your edit—it sets the entire mood. The Video Star app offers a dedicated color editing window that lets you color-correct and create color gradings. We’re going to show you how to master these editing tools to perfect the coloring of your edits.
What Is Color Correction? How to Use Custom Coloring in Video Star
Before vs. After Color Correction
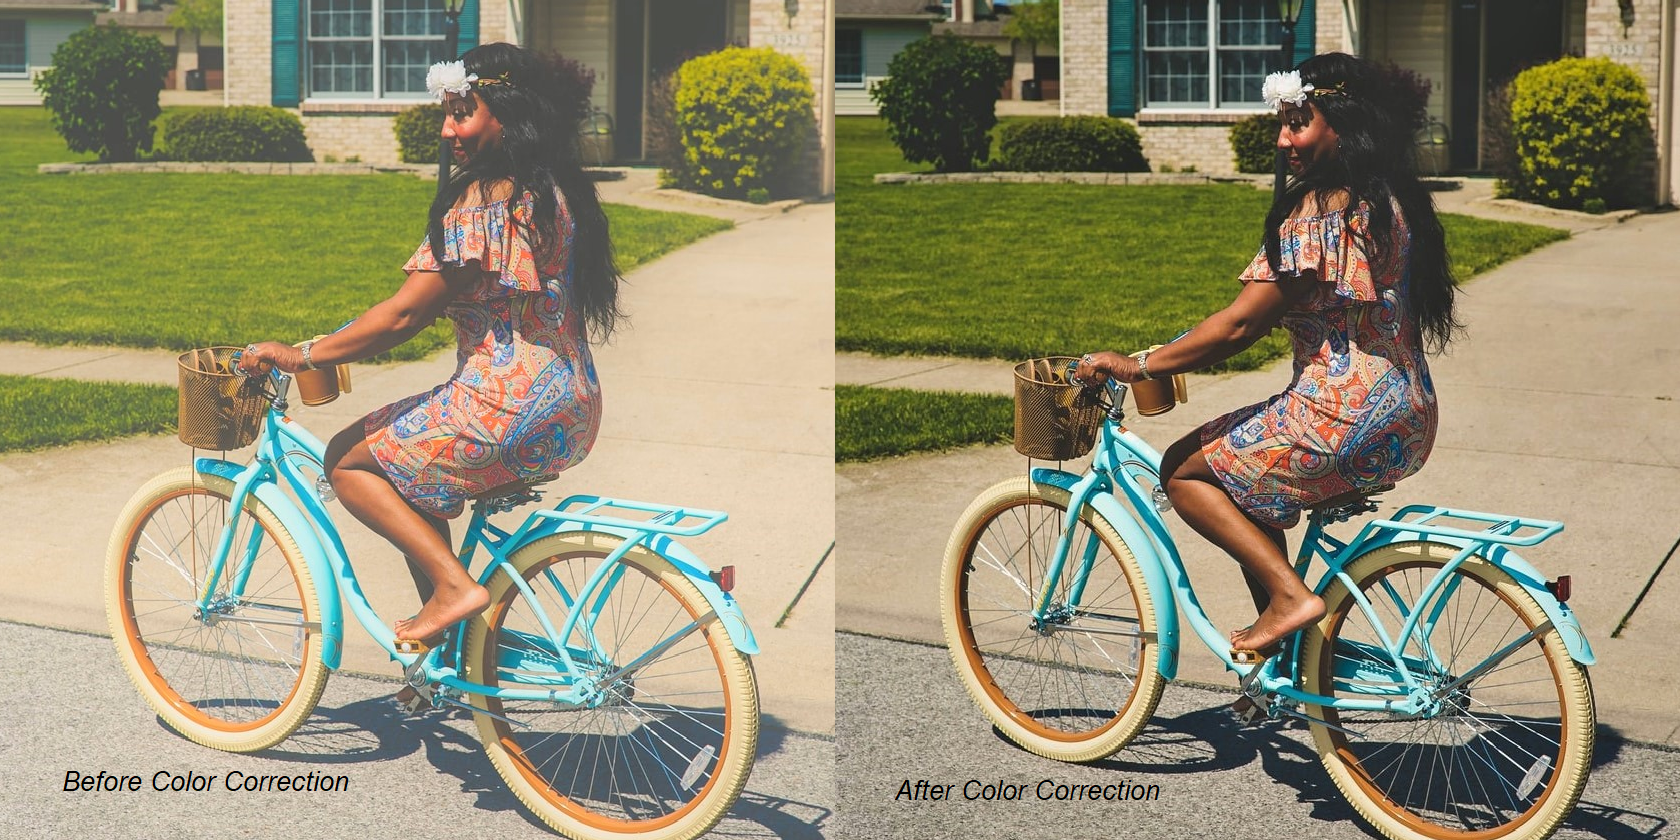
Color correction is an essential step that needs to be performed before applying color grading. It’s the process of adjusting the color balance on each clip to get a consistent visual appearance over the entirety of the footage. The purpose of color correction is not only to even out the appearance over all the clips but also to achieve a near-accurate portrayal of how the human eye would naturally view an image.
For example, if you’re making a video edit of a celebrity, you’re most likely going to retrieve footage of them from various sources. The color balance of the different clips won’t be the same, and color correction will stabilize this difference. It typically involves adjusting the exposure, brightness, contrast, whites and blacks, saturation, and hues.
What Is Color Grading? How to Use Custom Coloring in Video Star
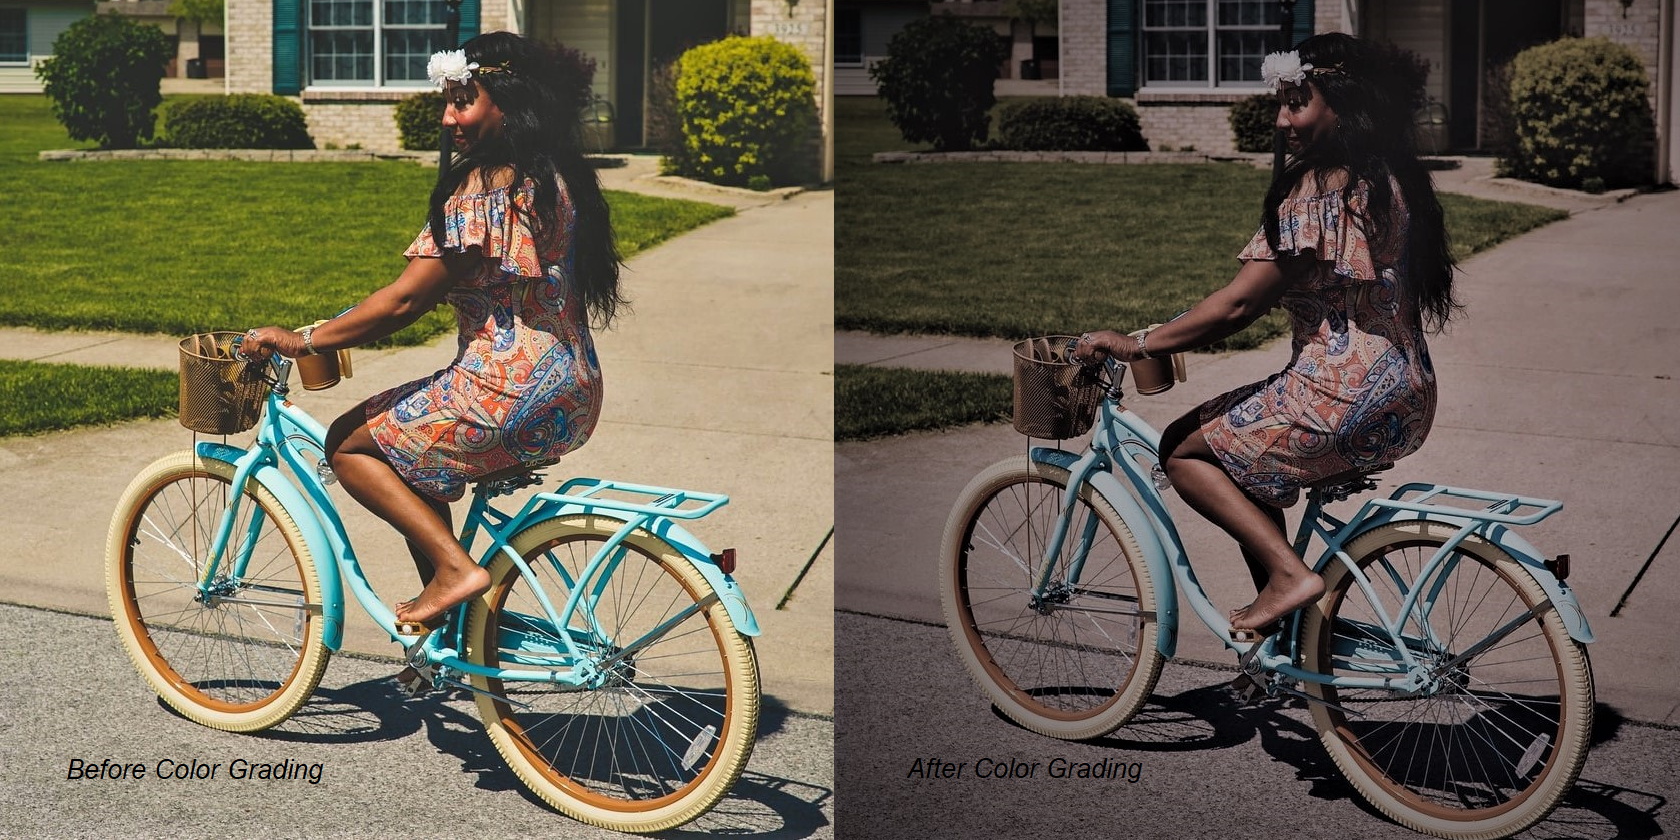
Before vs. After Color Grading – How to Use Custom Coloring in Video Star
Color grading is generally applied over the finished edit—in some cases, it might be applied to individual clips depending on the editor’s workflow. The purpose of color grading is to enhance an image to set the mood for your story. The method is similar to color correction, but without its rule of neutrality. It’s a creative process that will be unique to every editor or edit. In other words, you can do whatever you want in the color grading process—creativity is subjective. Color grading will involve elements such as light levels, colors, shadows, and some effects.
How to Use Custom Coloring on Video Star How to Use Custom Coloring in Video Star
Before continuing, ensure that you have the Video Star app for iOS. To gain access to the Custom Coloring tool, you also need to purchase Video Star’s Custom Coloring pack or get a Pro Subscription that gives you access to the app’s entire suite of tools.
Download: Video Star (Free, in-app purchases available)
After opening Video Star, you can locate the Custom Coloring window from the Thunderbolt icon on the home screen. The Custom Coloring window is specifically developed for color editing. It includes all the basic tools that you’ll find in any video or photo editing app, as well as some features unique to Video Star. We’re going to go over the layout of this window and show you how to use these tools for color correction and color grading. How to Use Custom Coloring in Video Star
- From the main window, tap New, and select Transform. Then, open the clip in Custom Coloring.
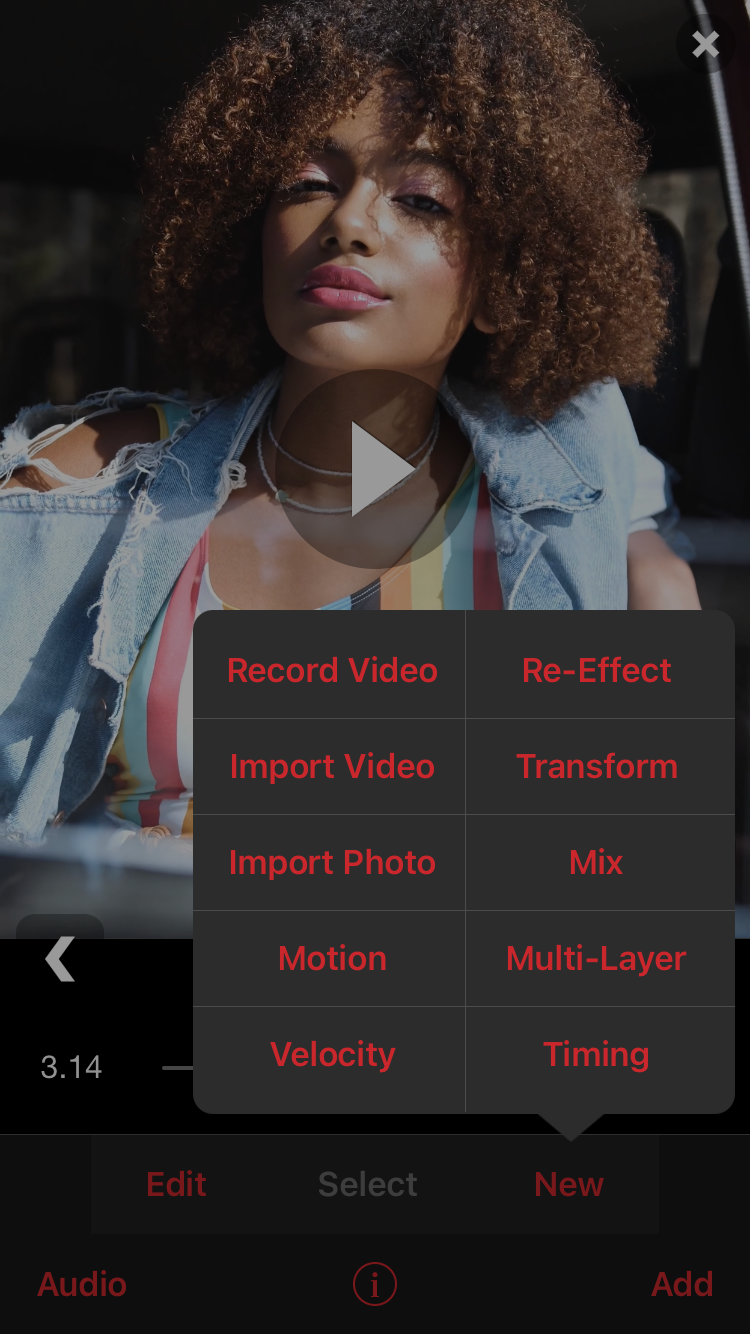
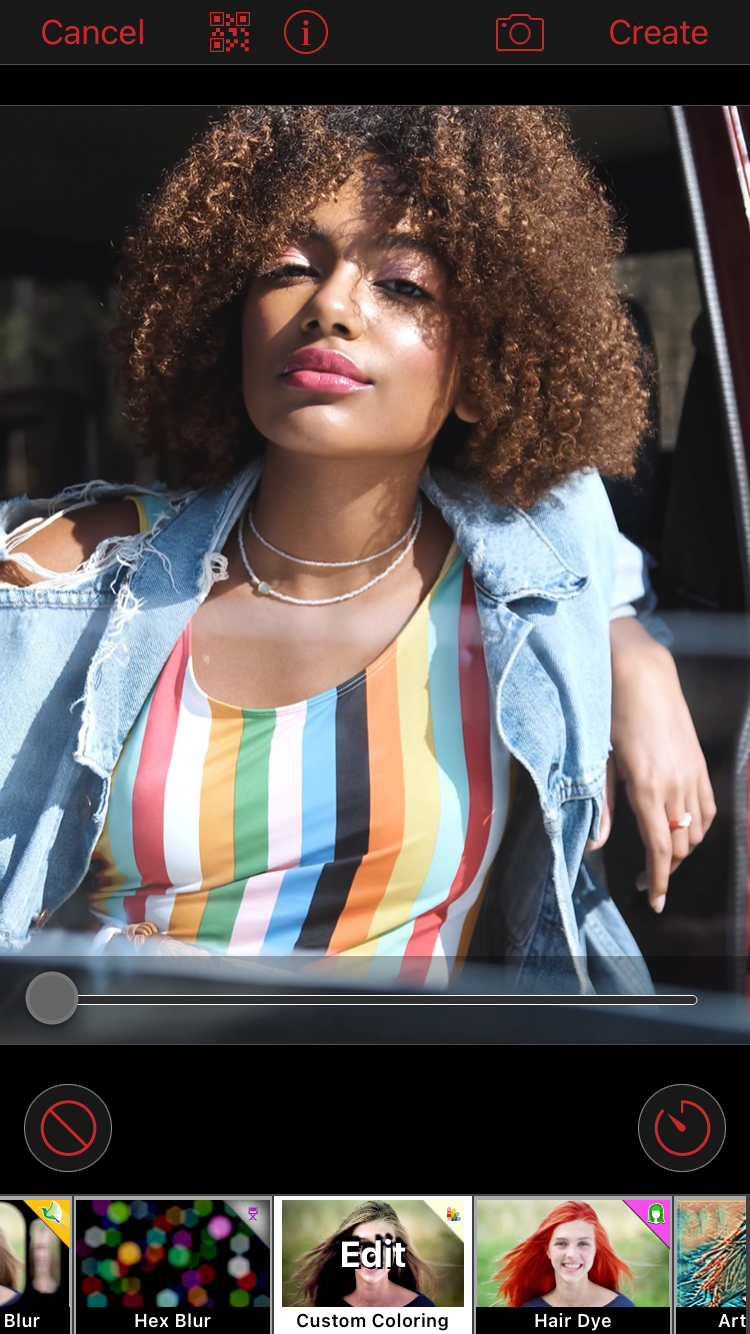
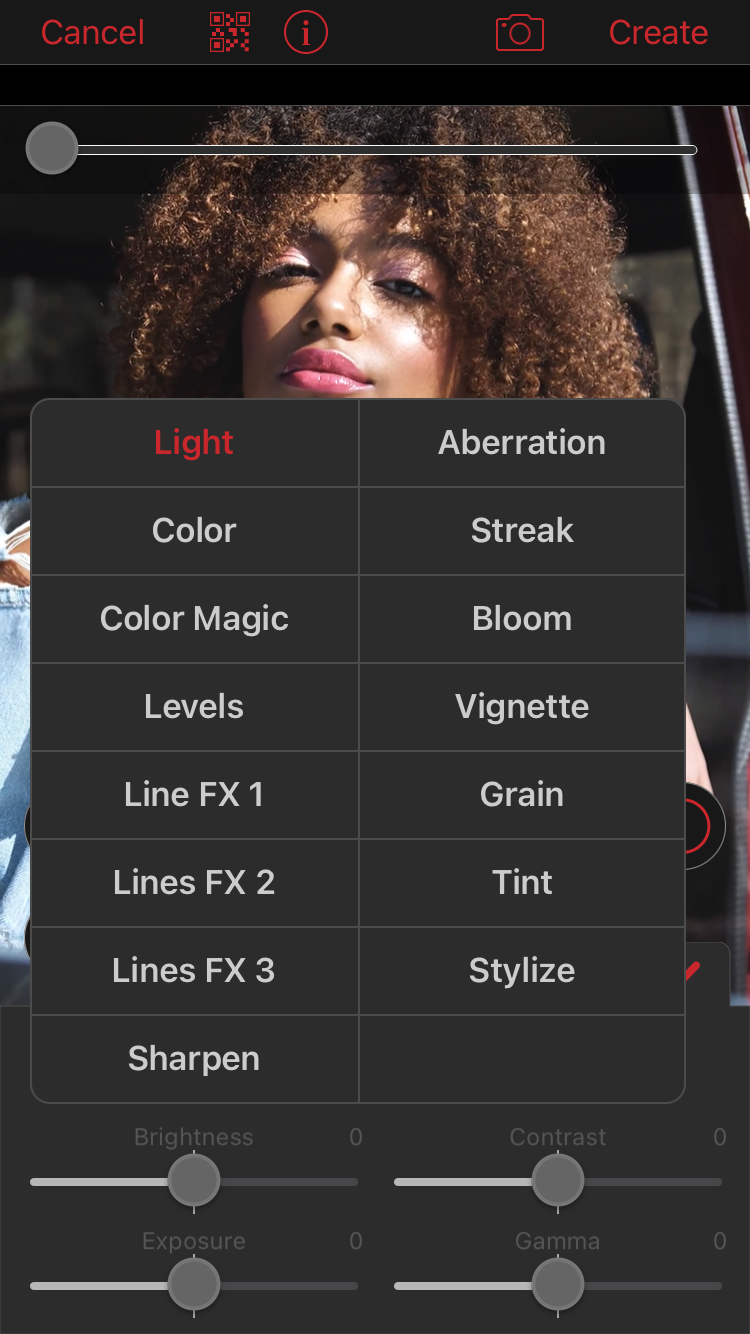
- It’ll open on the Light tool by default. To view all the other tools, tap on Light.
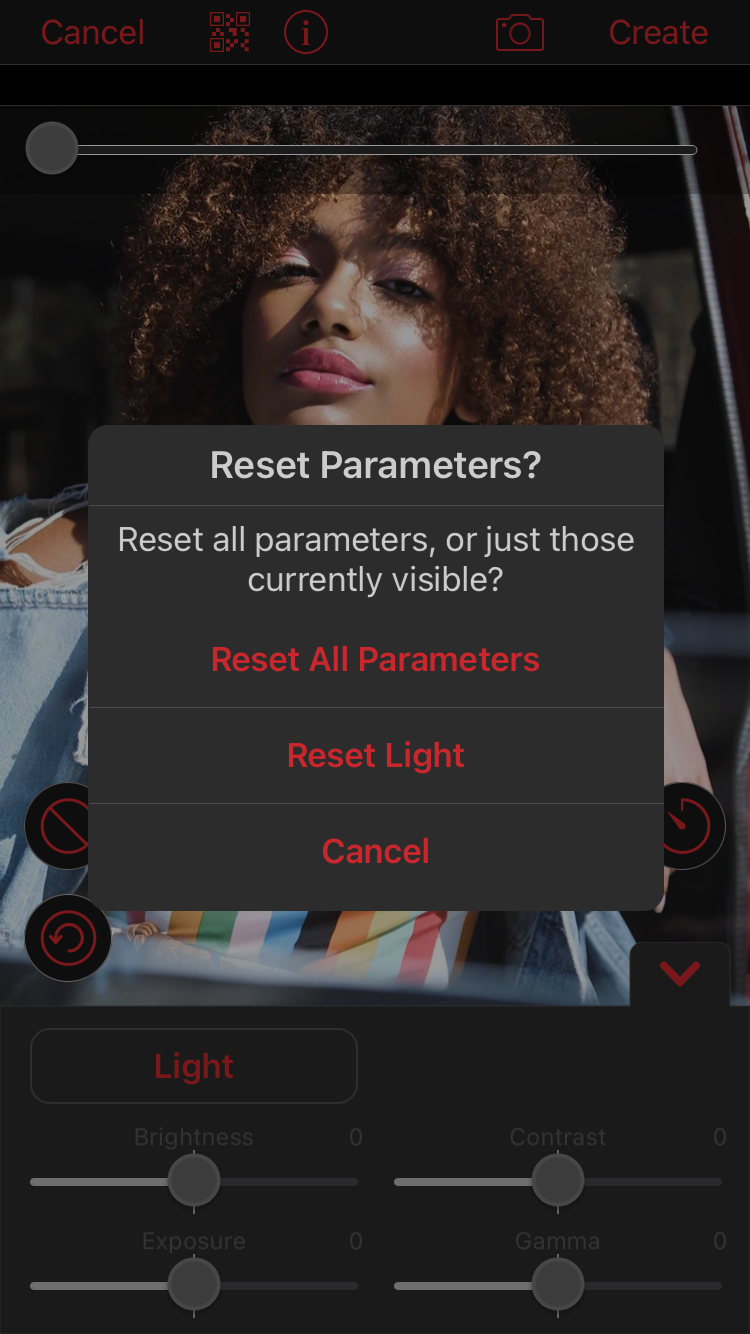
- Custom Coloring saves the settings of any previously edited clips. To reset it, tap on the arrow icon at the bottom left and select Reset All Parameters. You can also reset the parameters of individual features. How to Use Custom Coloring in Video Star
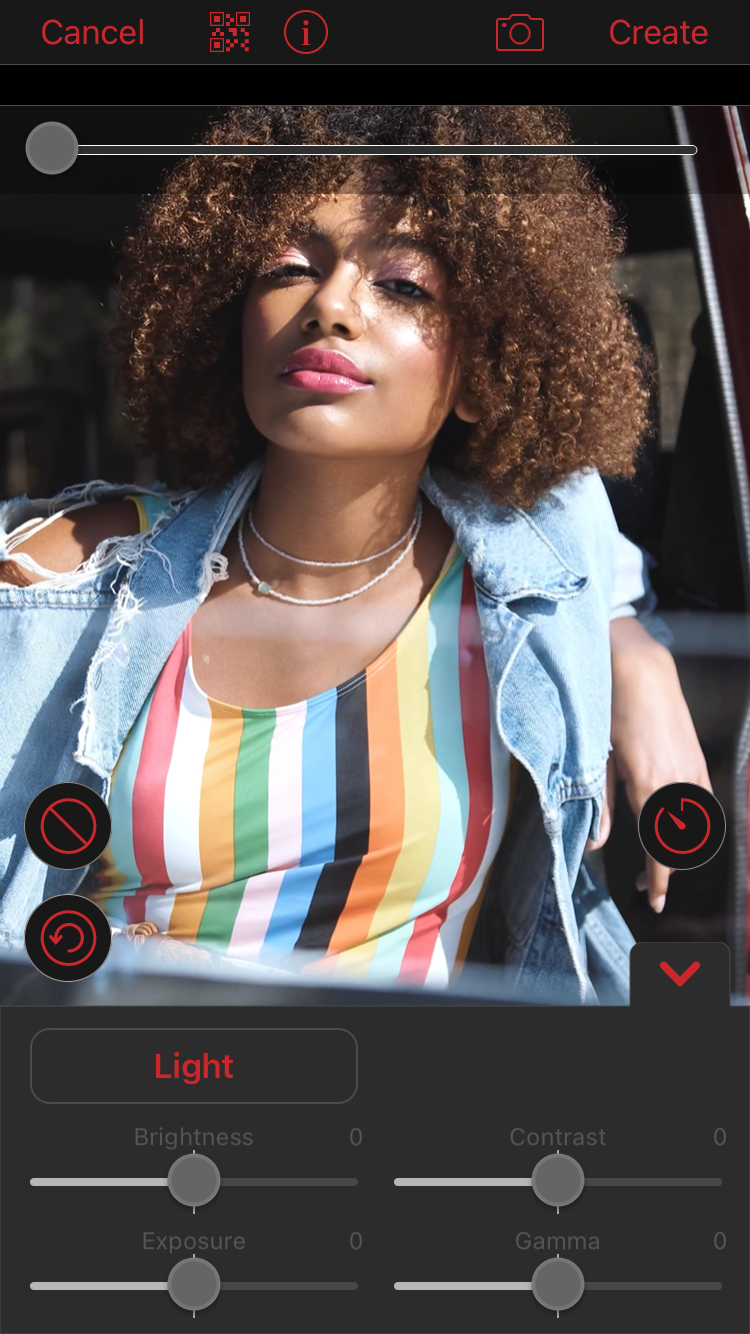
- Whenever you’re done with your coloring, view the clip by dragging the playback slider at the top, and hit Create at the top right.
Navigating the Custom Coloring Window How to Use Custom Coloring in Video Star
From the main window, tap New, and select Transform. Then, open the clip in Custom Coloring. It will open on the Light tool by default. To view all the other tools, tap on Light.
Custom Coloring saves the settings of any previously edited clips. To reset it, tap on the arrow icon at the bottom left and select Reset All Parameters. You can also reset the parameters of individual features. Whenever you’re done with your coloring, view the clip by dragging the playback slider at the top, and hit Create at the top right.
How to Use Color Correction Tools in Custom Coloring
Color correction will be different for every clip. The example footage below is somewhat over-exposed and desaturated. This makes an image look faded and not how the naked eye would view it. We’re going to show you how to neutralize it.
Follow the steps above to open your clip in Custom Coloring and reset all the parameters. Color correction should ideally be applied before you start editing the clips with effects and motion.
Light Adjustments
Let’s start with Light. Notice how we’ve turned down the Brightness and Exposure, and turned up the Contrast. This already makes the image easier on the eyes as the lighting doesn’t seem to scream at you anymore.
Color Adjustments How to Use Custom Coloring in Video Star
Then, we edited the Color. We’ve turned up the Saturation, Vibrance, and Temperature to make the colors appear less faded and more how they would in real life.
Most of the time, this is all you need to tweak for color correction, but there are several other tools that can come in handy. We’ve adjusted the Levels, which are the different ranges of exposure. For example, turning down the High Levels will reduce only the brightest points of an image. Levels also include Whites and Blacks. Decreasing the Whites will reduce the white points on an image and vice versa.
If your footage has a seemingly unnatural color range, you can adjust the main color points, namely Red, Green, and Blue, with the Stylize tool. This can help you achieve a more realistic visual appearance.
The settings will be different for every clip, as their original color balance will differ. Just try to get the same coloring across them all, and make it look natural.
How to Use Color Grading Tools in Custom Coloring
Color grading will be entirely unique to your creative vision. With the example below, we’ve opted for a retro, purple and blue aesthetic.
Sometimes, it’s necessary to adjust the same features that you utilized in color correction to achieve the color grading you want. For this clip, we’ve turned down the Exposure and Vibrance to create a toned-down vibe.
If you’re new to color grading, Color Magic is a good option. First, turn it on by checking the Enable box. Color Magic contains a list of preset colorings from which you can choose. Select the type of preset from the popup when you tap on Bright Magic (this is the default), select the color from the Selection icons, and adjust its Intensity.
Tint Adjustments
Tint allows you to add solid and mixed color tints. Tap on the colored block to open the color wheel, select a color, and adjust its opacity with the slider. This is an essential tool for those who wish to focus the style of their edit on a specific color.
Bloom and Streak Effects
Bloom is a great tool to use if there are bright points in the footage. It enhances these points by creating a blooming effect from where they’re situated. You can adjust the color and intensity of the bloom. Streak is an effect that adds light streaks over the image. You can also adjust its color and intensity.
Vignette and Line FX
One of the most beloved coloring effects is Vignette. It creates a color blend around the edges of the frame. Typically, it’s black to give a shadow effect. However, Video Star lets you choose the color, as well as the size, opacity, and positioning of the Vignette effect. If you want to take the visuals of your edit a step further, add Line FX. This effect creates an outline around the people or objects in the footage. This will make a person or object stand out and further enhance the image overall. You can also adjust its color, opacity, and thickness.
Aberration and Grain Effects
Aberration is an optical effect that spreads out the light, creating a distorted or blurred result. This is an ideal tool for retro themes. Grain is a noise filter that adds a still, static effect over the image. You can control the intensity and the size of the “grains.” This is also a good tool for retro and vintage themes.
There is no rule as to when you should apply color grading—it’s simply more convenient to add it at the end when all the clips are merged. However, if your Video Star edit requires applying color grading to individual clips, or creating different color gradings for separate clips, you can always export your Custom Coloring settings as a QR code. That way, you can use and alter the same settings again and again.
Master Your Colorings With Video Star How to Use Custom Coloring in Video Star
The coloring is what ties everything together in a video edit, so this is not a step you want to skip. Video Star’s Custom Coloring window provides you with all the tools you need for advanced color correction and color grading. Master these tools to make your footage pop and stand out from the rest.
===OUTRO: How to Use Custom Coloring in Video Star to Make Your Footage Pop provides you with the insights and techniques needed to elevate your video edits. By mastering color correction and color grading, you can ensure your videos have a professional and polished look. Start experimenting with Video Star’s powerful tools today, and watch your footage transform into stunning visuals. How to Use Custom Coloring in Video Star
Comments are closed.