The Secret Crochet Circle Formula (and How to Tweak It)
===INTRO: The Secret Crochet Circle Formula (and how to tweak it) is a game-changer for crochet enthusiasts. Whether you’re a beginner or an experienced crocheter, mastering the art of creating perfect crochet circles can elevate your projects to the next level. In this post, we’ll reveal the secret formula for crocheting flawless circles and share tips on how to tweak it to suit your creative needs. Let’s dive into the world of crochet circles and discover the secrets to achieving perfection.
1. Understanding the Basics of Crochet Circles

Crochet circles are foundational shapes used in a variety of projects, from doilies and coasters to hats and blankets. The key to a perfect crochet circle lies in the formula used to increase stitches evenly, ensuring a smooth and flat shape.
The Magic Ring
The magic ring (or magic loop) is a technique used to start crochet circles. It creates a tight, adjustable center that prevents a hole from forming in the middle of your circle. To create a magic ring:
- Wrap the yarn around your fingers to form a loop.
- Insert your hook into the loop and pull up a loop of yarn.
- Chain one (or more, depending on your pattern) to secure the loop.
- Crochet the required number of stitches into the loop.
- Pull the tail of the yarn to close the loop tightly.
2. The Secret Formula for Perfect Crochet Circles

The secret crochet circle formula involves a specific pattern of increases to ensure your circle remains flat and even. The basic formula is:
Round 1: Foundation
- Start with a magic ring and crochet the required number of stitches (usually six single crochets for single crochet circles).
Round 2: First Increase
- Double the number of stitches by placing two stitches in each stitch from the previous round.
Round 3: Second Increase
- Increase evenly by placing two stitches in the first stitch, then one stitch in the next. Repeat this pattern around.
Round 4: Continue Increasing
- Continue increasing by adding an extra single stitch between each increase. For example, place two stitches in the first stitch, then one stitch in the next two stitches. Repeat around.
This pattern of increasing continues with each round, ensuring the circle remains flat:
- Round 5: Two stitches in the first stitch, one stitch in the next three stitches, repeat.
- Round 6: Two stitches in the first stitch, one stitch in the next four stitches, repeat.
3. Tweaking the Formula for Different Projects – Secret Crochet Circle Formula

Depending on the type of yarn, hook size, and desired project, you might need to tweak the secret formula to achieve the perfect circle.
Adjusting for Tighter Circles
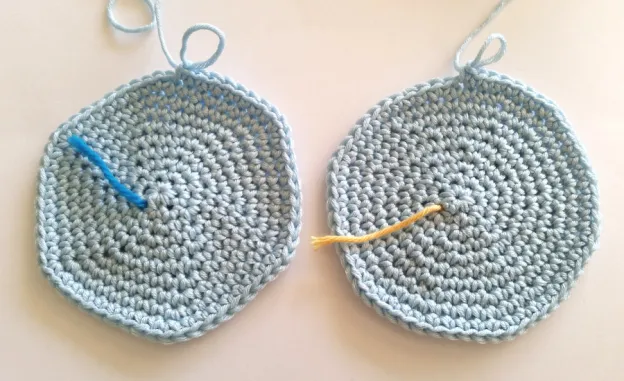
If your circle is ruffling or too loose, reduce the number of increases per round. For example, you can try increasing by adding one extra single stitch every two rounds instead of every round.
Adjusting for Larger Circles – Secret Crochet Circle Formula
For larger circles, you might need to increase more frequently. You can add two stitches between each increase or use double crochet stitches instead of single crochet stitches to create a larger, more open circle.
Using Different Stitches
Experiment with different stitches like half-double crochet (hdc) or double crochet (dc) to create various textures and effects. The increase pattern remains the same, but the stitch type will change the overall look and feel of your circle.
4. Troubleshooting Common Issues
Ruffling or Curling
If your circle is ruffling, you might be increasing too much. Try reducing the number of increases per round. If it’s curling, you might not be increasing enough. Add more increases to flatten it out.
Gaps Between Stitches
If you notice gaps between your stitches, consider using a smaller hook size or tighter tension to create a denser fabric. Alternatively, you can use a different stitch type that provides better coverage.
5. Creative Uses for Crochet Circles
Crochet circles are versatile and can be used in various projects. Here are a few ideas:
- Coasters and Doilies: Create decorative coasters and doilies by combining different circle sizes and patterns.
- Hats and Beanies: Start with a crochet circle and continue increasing until you reach the desired diameter, then work even to create the sides.
- Amigurumi: Use crochet circles as the base for creating stuffed animals and toys.
6. Conclusion
===OUTRO: The Secret Crochet Circle Formula (and how to tweak it) unlocks endless creative possibilities for your crochet projects. By mastering the basic formula and learning how to adjust it, you can create perfect circles tailored to your needs. Whether you’re making coasters, hats, or intricate doilies, the secrets revealed in this post will help you achieve professional-looking results. Start experimenting with your crochet circles today and elevate your crafting skills to new heights.

